Two-Factor authentication: How to secure your accounts?
How to secure your online accounts by setting up two-factor authentication (2FA) and why is it important to do so? Step-by-step guide for 2FA.

Two-factor authentication (2FA) is a good way to secure your online accounts in a time where data breaches and stolen account credentials hit the news headlines on a daily basis. This article explains the terminology, what 2FA is and why you should use it. Then, taking the Google account as an example, it describes how you can enable 2FA for your online accounts and use an Authenticator mobile app to generate your 2FA codes.
In a presentation at Usenix's Enigma 2018 security conference in California, Google software engineer Grzegorz Milka revealed (youtube presentation) that less than 10 per cent of active Google accounts use two-factor authentication (source). That was over a year ago, but my guess is that the adoption rate of 2FA has not even exceeded 25% since then. An extra reason to write this article on how to setup 2FA.
Contents
- What is two-factor authentication?
- Why you should use 2FA?
- 2FA? There's an app for that!
- How to enable 2FA for your (Google) account?
- Setting up the Authenticator app:
- via Authy or
- via Authenticator+
- Enable 2FA for other accounts
What is two-factor authentication?
Authentication is the process of verifying the identity of a user. When, for example, Gmail or Facebook asks you to login with a password, it assumes you are the only one knowing the password that belongs to the username and thus identifying you as the rightful owner of the account.
In this example the password is one identifying factor for a user account, but in fact anything that you know (password, PIN, etc.), have (physical key, smart card, phone etc.) or are (biometrics like a finger print or iris-scan, etc.) that would uniquely identify you, could be used as an authenticating factor for your account.
Multi-factor authentication (also called two-factor authentication or 2-step verification) means that more than one factor is used to identify the owner of a piece of property (e.g. house, vault, or user account). Ideally each factor would come from a different category (know, have, are). In multi-factor authentication you would be asked to provide all required factors to access that piece of property.
Some examples of multi-factor authentication you might already use or know, are the following:
- a credit card and a PIN for a bank account,
- a password and a one-time generated code (by an app or device) for an email account,
- a physical key and a finger print for a house, or
- a secret door-knock and passphrase for kids playing in a tree-house.
In this article I use the term 2FA, but know that it can be interchanged with MFA or 2-step verification.
Why you should use 2FA
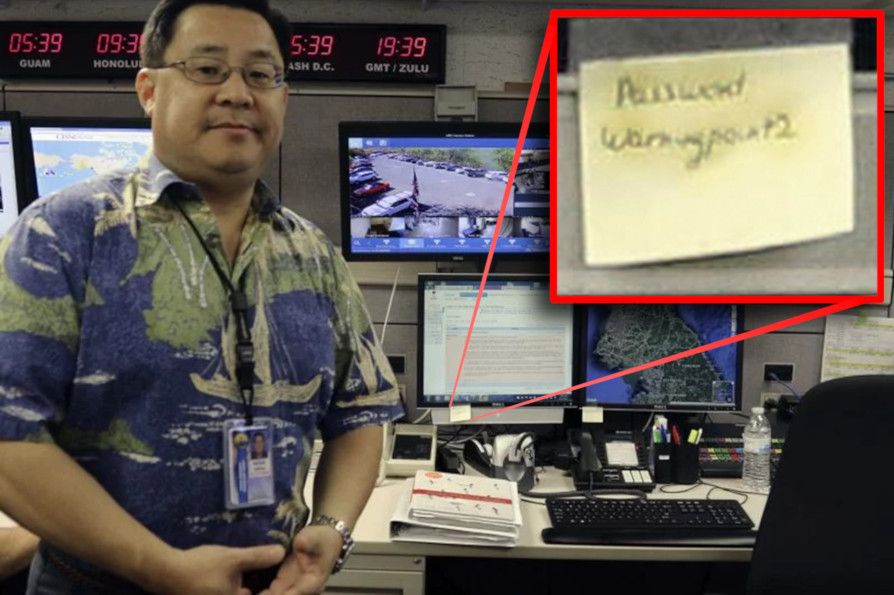
Consider account authentication with one factor, like a password. If that single factor would fall into the wrong hands, the entire account could be compromised. With the ever growing list of data breaches, chances are this password may be leaked somewhere in the future, or already has. Having proper password hygiene like using strong passwords and never reusing a password reduces the risk of your account being compromised when it is part of a breach. However, when the service being breached stores passwords as plain-text or uses a weak hashing algorithm or you have your password written down on a post-it for example, you still may have a problem:
Any account you own may be the victim of a hack. While the new passwordless Web Authentication (WebAuthn) standard developed by W3C and FIDO alliance is still being adopted, multi-factor authentication is still a great way to secure your accounts. This article describes how to do that.
Sidenote: If you would like to verify whether your e-mail address (or even password) were exposed in any previous databreaches, I highly recommend checking out the https://haveibeenpwned.com/ website setup by Troy Hunt.
The goal...
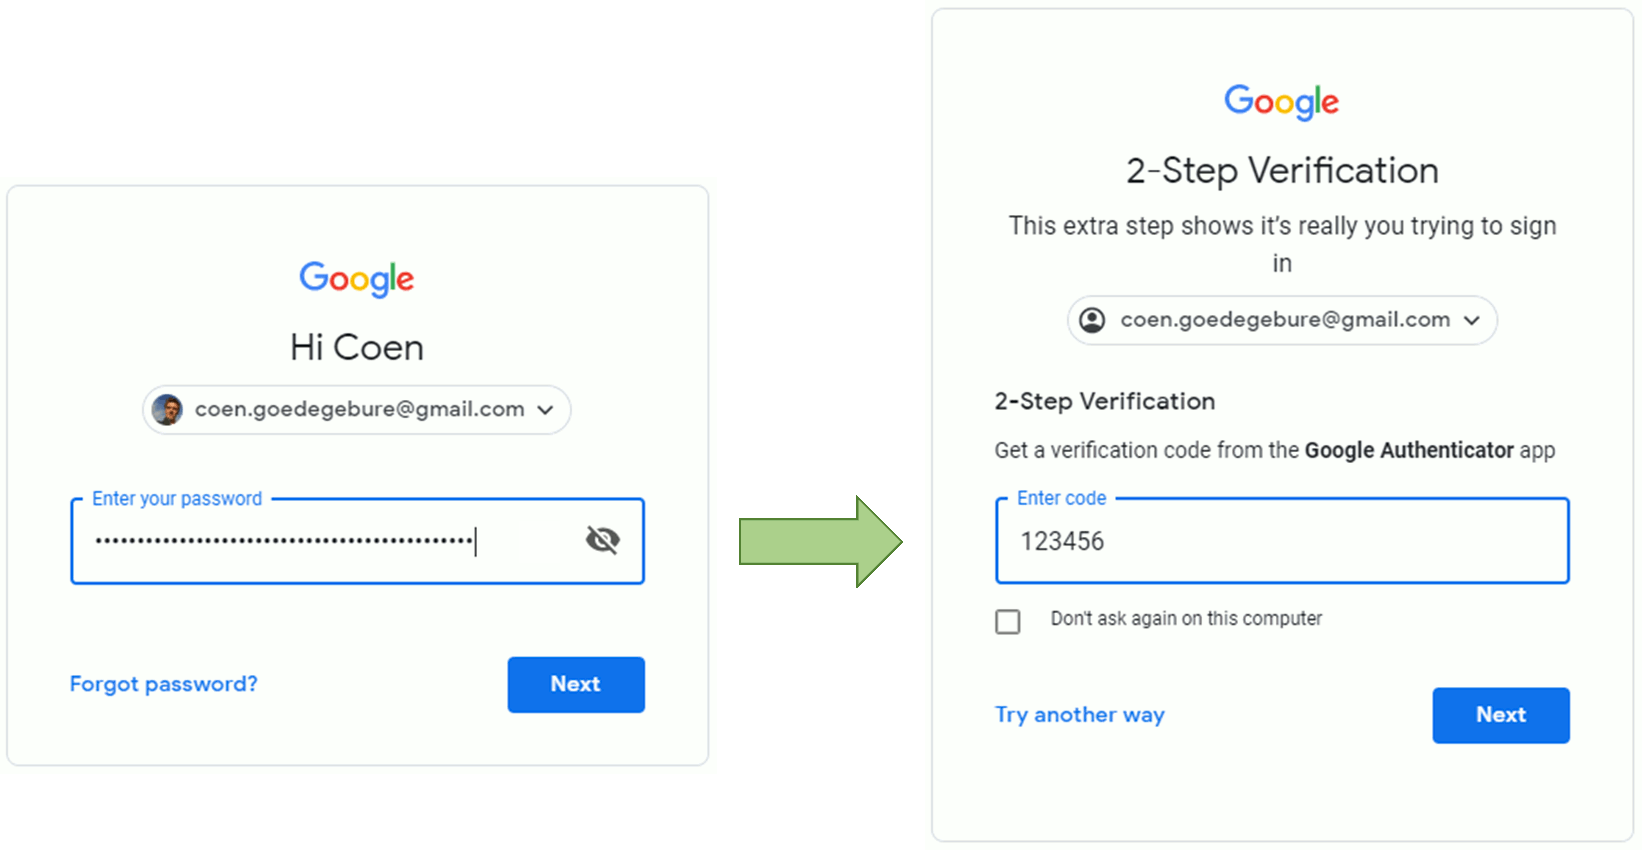
By the end of this article you will have an authenticator app on your phone that will generate a new code every 30 seconds. This code is your second factor and is also known as a Time-based One-Time password (TOTP). When you login to an account that has 2FA enabled, you will be prompted for a code after you've submitted your username and password. Check the app for the current code and enter that. When the code and the password are correct, you will have access to your account.
2FA? There's an app for that!
Before we start, let's install an authenticator app on your mobile phone.
There are several popular authenticator apps on the market. While it will depend on your personal preference and requirements, I recommend using an app that allows you to create a backup (or synchronize) of your codes. More on that in the Good practice chapter below. The following apps are a few of the most popular ones:
- Authenticator Plus website (App: iOS, Android) free or one time $3,99 to unlock pro features
- Authy website (App: iOS, Android) 100 authentications free per month (more pricing)
- Google Authenticator website (App: iOS, Android) free (read remarks below)
Google Authenticator does not allow to create backups of your codes, so losing your phone will require you to recreate an authenticator code for each of your accounts. Since you won't be able to access your account without a code, unless you have (and you should by the way) written down the backup codes you get when you enabled 2FA on an account, you might be in trouble.
In the past I made the decision to go with Authenticator Plus. This because of its pricing and usage model, the fact that you can import from a previous Google Authenticator installation and can setup your own cloud provider for backups. I'm positive Authy is a great tool that can do many of these things as well nowadays. In this article I included setup guides for both Authy and Authenticator Plus.
Good practice!
In a general sense it is a good idea to regularly explore what data or access you may lose when a device you own is no longer accessible (broken, stolen, etc.) and what can you do to prevent this loss. If your phone is stolen, how much trouble will it give you? Will you lose all your precious photo's or do you regularly make backups? Can you easily (or even at all) recover from these backups? These are important questions to ask yourself when you decide to put your valuable assets in the hands of any medium.
How to enable 2FA for your account?
Many online services that require an account have the option to enable 2FA. You usually find the page to enable 2FA in your account settings of that service.
As an example, for this article, I describe this process for Google accounts. This because Google is widely used and enabling 2FA for Google involves a little more complexity than activating it for other services.
We'll first enable 2FA in the Google account, and then register it in the authenticator app of you choice.
Enable 2FA in Google
Turning 2FA on for Google will enable this feature in all the Google products like Google Drive, GMail, Calendar, etc.
- Sign in to your Google account.
- In the top-right corner you'll see an icon with the picture you chose for your account or a letter of your first name, in my case C. Click on that icon and then on 'Google Account'. This will open your Google account settings.
- In the menu on the left click 'Security'. This will show a page with your security settings:

- On the Security page, in the category 'Signing in to Google', notice '2-Step Verification' is set to off.
- Click the '2-Step Verification' line. Press 'Get Started' and login again with your username and password.
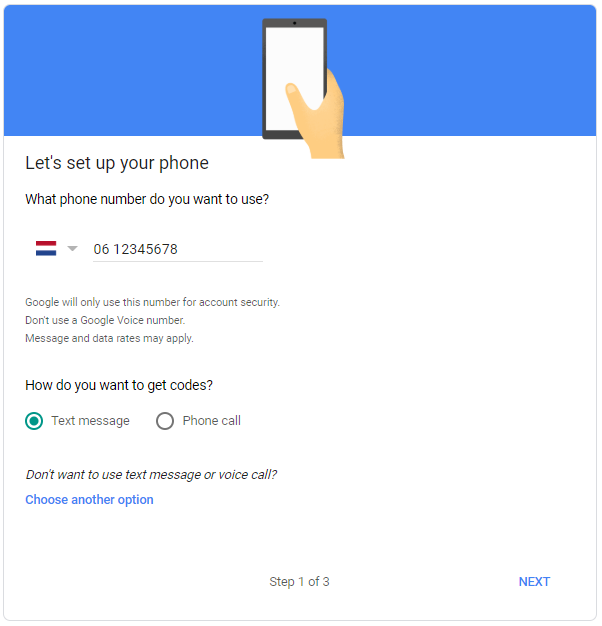
- In the popup that appears, enter your phone number. This is done as a an extra temporary means of verification until you have 2FA with you app enabled. Select how you want to get the temporary code and click 'Next'
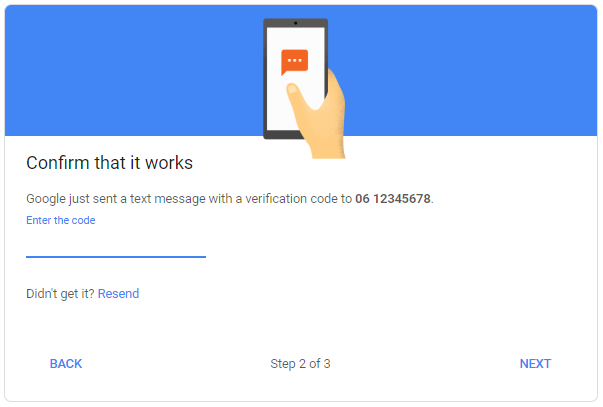
- On the phone number you entered in your previous step, you will receive an SMS or phone call with a verification code. In the next screen (see below), enter that code and press 'Next'.
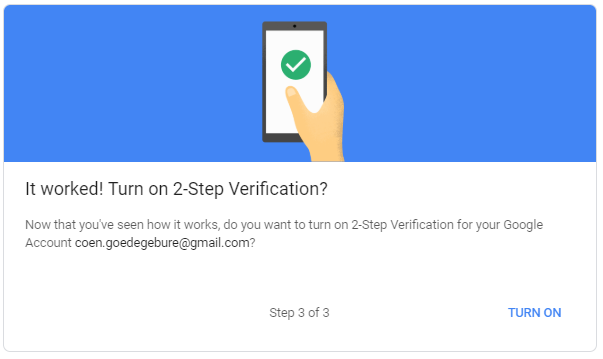
- If the code is correct, a confirmation screen appears stating everything is set to turn on 2-step verification. Click 'Turn On'.
2FA is now enabled for your account. If you would stop the process at this stage, an SMS (or phonecall) with a verification code will be sent to you every time you login to Google. Using your phonenumber as a primary means for 2FA is a bad idea. Granted, it is better than no 2FA, but hackers can fairly easily intercept SMS traffic. Check out this video for an example.
We want to add the Google account to the authenticator app we installed in a previous chapter.
Account registration in Authenticator app
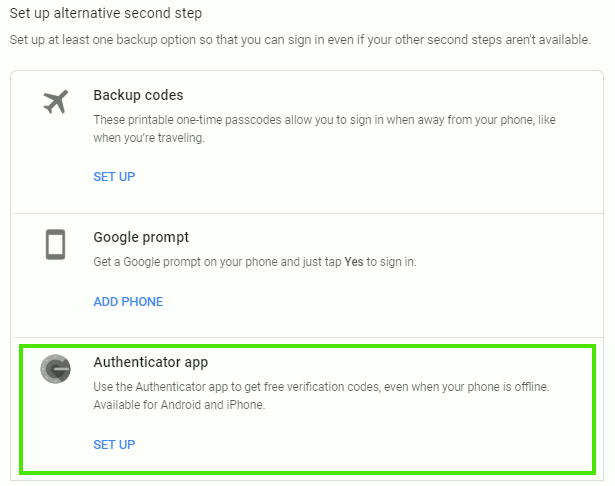
After click 'Turn On' in the last step of the previous chapter, Google shows a page where you can add an Authenticator app as a second factor. In other words: register the Google 2FA account within the Authenticator app you have on your mobile phone.
Click the "Authenticator app" option (depicted by a green frame in the image below). Note that it has a Google Authenticator icon, but it doesn't matter which authenticator app you use to set this up.
Clicking the 'Authenticator app' option pops up a wizard-dialog that allows you to choose whether you use an Android or an iPhone app. The choice doesn't really matter for the end-result, it only determines whether to provide you a link to the Android or Apple version of the Google Authenticator app on the next page.
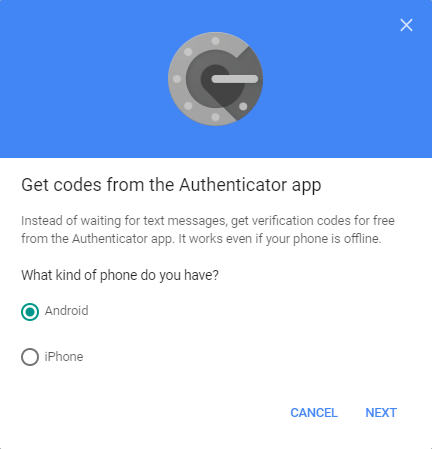
Make a choice and click 'Next'. The following page shows a QR Code:
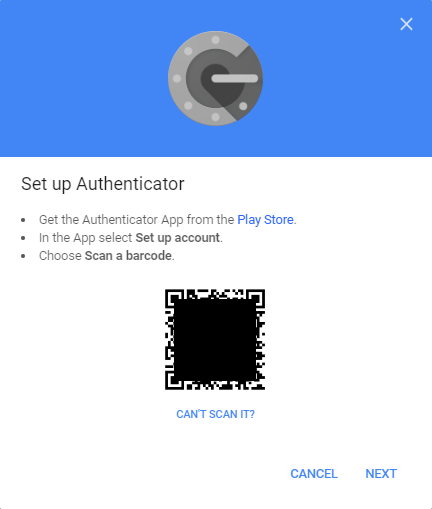
The QR-code depicts a unique code for the registration of your Google 2FA account. This is the moment to take your authenticator app of choice and scan the QR code. This article describes the registration process for Authy and Athenticator Plus:
Register 2FA account with Authy
When you start Authy app for the first time, you will see a big Plus-sign on the screen.
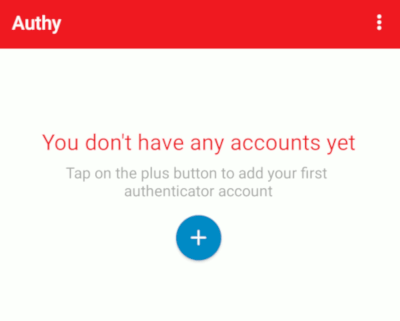
Click this +-sign to add an authenticator account.
Doing so will display a dialog where you can choose between scanning a QR-code and manually entering a code. Some services provide this manual entry as an option when they do not support QR-codes.
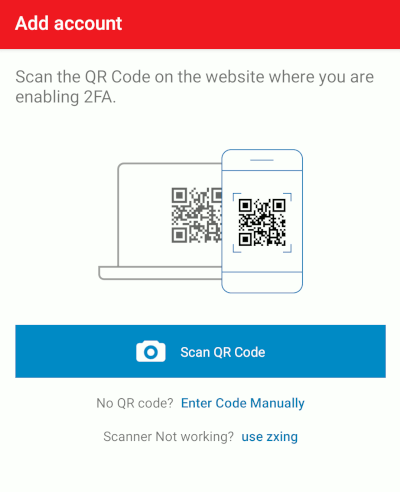
The example we use here fortunately supports QR-codes, so press the blue bar with the camera and use your phone's camera to scan the QR-code provided by Google in the previous chapter.
If all went well, Authy prompts you for an account name. Enter any name here that will allow you to recognize the code later. After you press done, your first account is created. Authy's main screen will immediately start generating codes for this account every 30 seconds:

You've now successfully registered your 2FA token for Google in the Authy app. Continue with the chapter 'Finishing up'.
Register 2FA account with Authenticator Plus
I'm using Authenticator Plus myself, so my app's main screen already contains a few entries:
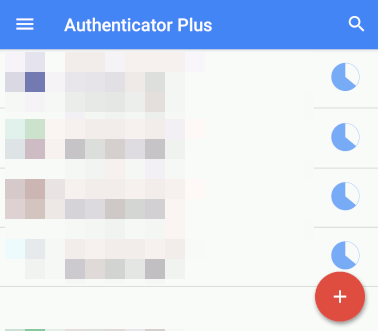
Click the big +-sign on the bottom-right to add an authenticator account. Doing so will show a pop-up menu with 3 options:
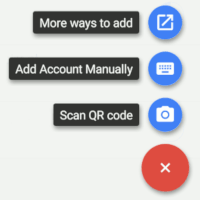
The bottom option is the one we're aiming for: Scan QR code. You can also manually add an account if the service you try to add does not support QR-codes. The 'More ways to add' option has some other options like using a third-party scanner for scanning codes. For this example, select the 'Scan QR code'-option.
Now use your phone's camera to scan the QR-code provided by Google in the previous chapter. As soon as you've done this, a new account entry will be added to the app's main screen:

You've now successfully registered your 2FA token for Google in the Authenticator Plus app. Continue with the next chapter 'Finishing up'.
Finishing up
After you have successfully scanned Google's QR-code and added the Google 2FA account to your favourite Authenticator app, press 'Next' on the dialog with Google's QR-code on it.
In order to make sure you have correctly added the code, Google will ask for one of the generated codes as a verification step:
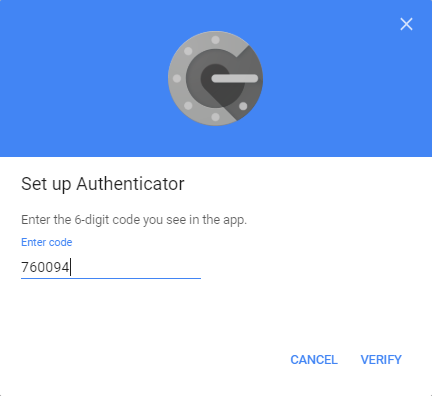
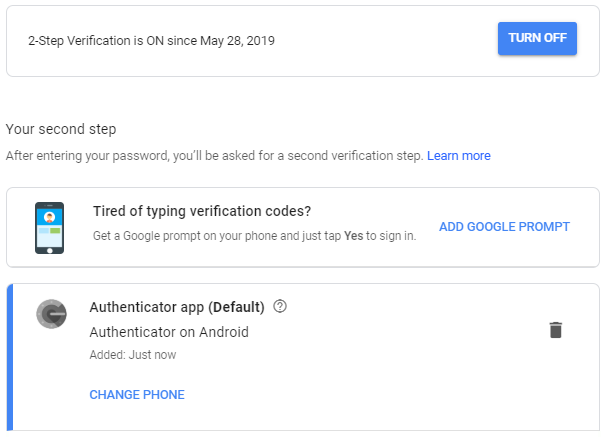
Type the code you see in your Authenticator app for the account you just added and press 'Verify'. If all is ok, the dialog closes. The Google security page will now have an entry stating that your Google account is protected with Two-factor authentication (or as Google displays '2-Step Verification') via an authenticator app.
Using 2FA
Now you've setup 2FA in Google and have your Google account in the Authenticator app of your choice, you will be prompted for a 2-step verification code everytime the Google service you're asked for your Google password. When you're prompted, just fill in the code your authenticator app provides at that moment, just like you did during the setup of your account.
Enable 2FA for other accounts
For completeness I added some links on where you can enable 2FA for other common accounts.
To enable Two-factor authentication for your facebook account, go to your account's Settings, then the 'Security and login' tab. You can also follow this link directly: https://www.facebook.com/settings?tab=security
You'll find the 'Use two-factor authentication' option on this page (see figure below).

To enable two-factor authentication for you account, go to your account's Settings (the little cogwheel next to your name on your profile page), then choose 'Privacy and security'. You can also follow this link: https://www.instagram.com/accounts/privacy_and_security/. Half-way the page you'll find the 'Two-Factor Authentication' option that allows you to edit its settings (direct link: https://www.instagram.com/accounts/two_factor_authentication/).
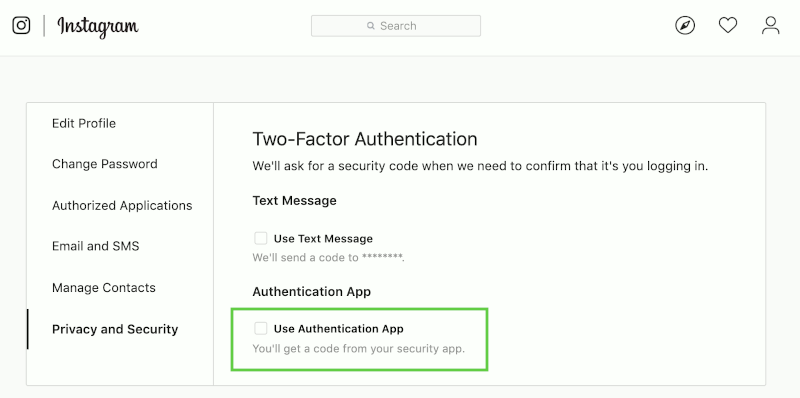
Note: At the time of writing, Instragram does not allow setting up 2FA with an authenticator App on the web. The mobile app does allow this option, so for now I suggest using your Instagram mobile app to set this up.
Cover photo by Ales Nesetril